Your Cart is Empty
When it comes to home improvement projects, installing baseboard corners can seem a bit daunting. However, with the right guidance and tools, you can achieve a professional-looking finish. Whether you're updating your baseboard design or tackling a new baseboard installation, knowing how to cut baseboard corners accurately is key. Let's explore some tips and techniques to help you master this task.
Baseboards come in various styles and designs, each adding a unique touch to your space. Before diving into installation, it's important to understand the different baseboard styles available.
If your project is focused on high-traffic areas where durability is as important as style, consider the Benefits of Using Corner Guard Molding to protect the upper portions of your wall corners simultaneously.
The most common baseboard styles include the traditional, colonial, and modern designs. Traditional baseboards have a simple, clean look, while colonial styles often feature more ornate details. Modern baseboards typically have a sleek and minimalist appearance.
Baseboard trim is essential for covering gaps between walls and floors. Baseboard trim options vary in size and design, allowing you to choose a style that complements your interior decor.
Before starting your baseboard installation, gather the necessary tools. Having the right tools on hand will make the process smoother and ensure a precise fit.
Miter Saw: A miter saw is crucial for cutting accurate angles on your baseboard corners.
Tape Measure: Accurate measurements are key to a successful installation.
Nail Gun: A nail gun secures the baseboards in place efficiently.
Level: Ensures your baseboards are installed straight.
Coping Saw: Useful for cutting intricate designs or working with corner baseboards.
Cutting baseboard corners precisely is the cornerstone of a flawless installation. Let's walk through the steps for achieving perfect corners.
While this guide covers wood and traditional materials, if you are working with metal or industrial accents, you should follow our How to Install Wall Trim: A Pro Guide for Metal & Aluminum for specific adhesive and fastening instructions.
For inside corners, you'll typically use a coping technique. Here's how:
Measure the Wall: Measure the length of the wall where the baseboard will be installed.
Cut the First Board: Using your miter saw, cut the first board at a 90-degree angle.
Cope the Second Board: Cut the second board at a 45-degree angle, then use a coping saw to trim along the profile to fit snugly against the first board.
Outside corners can be tricky, but with practice, you'll get the hang of it.
Measure the Corner: Measure both sides of the corner and mark your baseboard.
Cut at 45 Degrees: Use the miter saw to cut both pieces at 45-degree angles.
Fit Together: Fit the two pieces together, ensuring they meet smoothly at the corner.
Corner blocks are a great solution if you're looking for an easier way to handle baseboard corners. They eliminate the need for precise miter cuts.
Ease of Installation: No need for complicated cuts.
Decorative Element: Adds a decorative touch to your baseboard design.
Consistent Look: Ensures a uniform look at all corners.
Choose Your Style: Select corner blocks that match your baseboard design.
Attach Blocks: Secure the corner blocks in place before installing the baseboards.
Install Baseboards: Cut baseboards to fit between the blocks for a seamless finish.
Bullnose corners are rounded edges that can be challenging when it comes to baseboard installation. Here's how to tackle them:
Measure Carefully: Precise measurements are crucial for bullnose corners.
Use Flexible Molding: Consider using flexible molding that can bend around the curves.
Custom Fit: You may need to custom cut pieces to fit snugly around the bullnose.
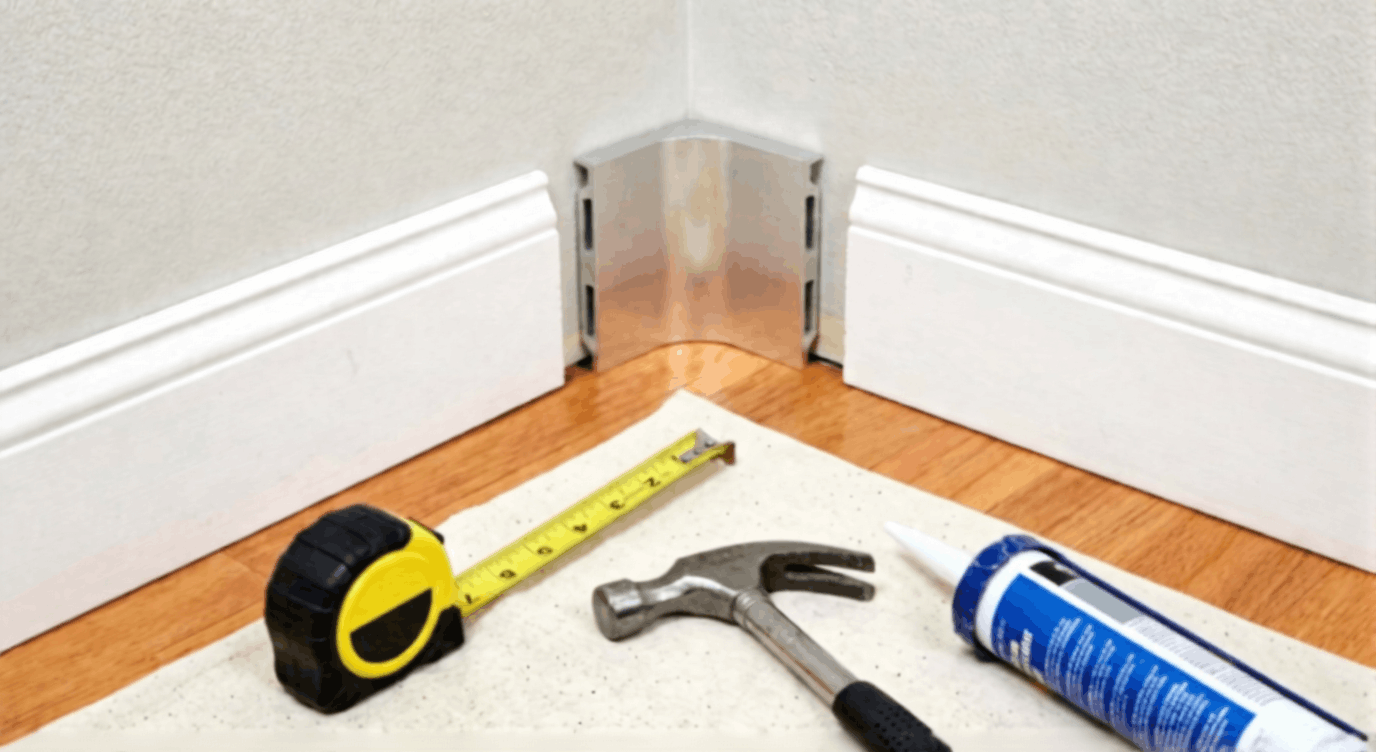
After installing your baseboards, the finishing touches are vital for a polished look.
Use caulk to fill any gaps between the baseboards and the wall. This step ensures a seamless transition and hides imperfections.
Once everything is in place, paint or stain your baseboards to match your room's decor. Sealing the baseboards protects them from wear and tear.
Installing baseboard corners doesn't have to be an intimidating task. With the right tools, techniques, and a little practice, you can achieve professional results. Whether you're using corner blocks, tackling bullnose corners, or mastering miter cuts, these tips will guide you through the process. Remember, attention to detail and patience are key to a successful baseboard installation.
By understanding different baseboard styles, using the proper tools, and following the steps outlined, you'll create a stunning finish that enhances the beauty and value of your home.
Comments will be approved before showing up.


