Your Cart is Empty
Ever moved a piece of furniture and accidentally taken a chunk out of a wall corner? That frustrating, crumbly damage happens because a raw drywall edge is surprisingly fragile. The secret to fixing it—and preventing it in the first place—lies in a simple, hidden part found in almost every modern home.
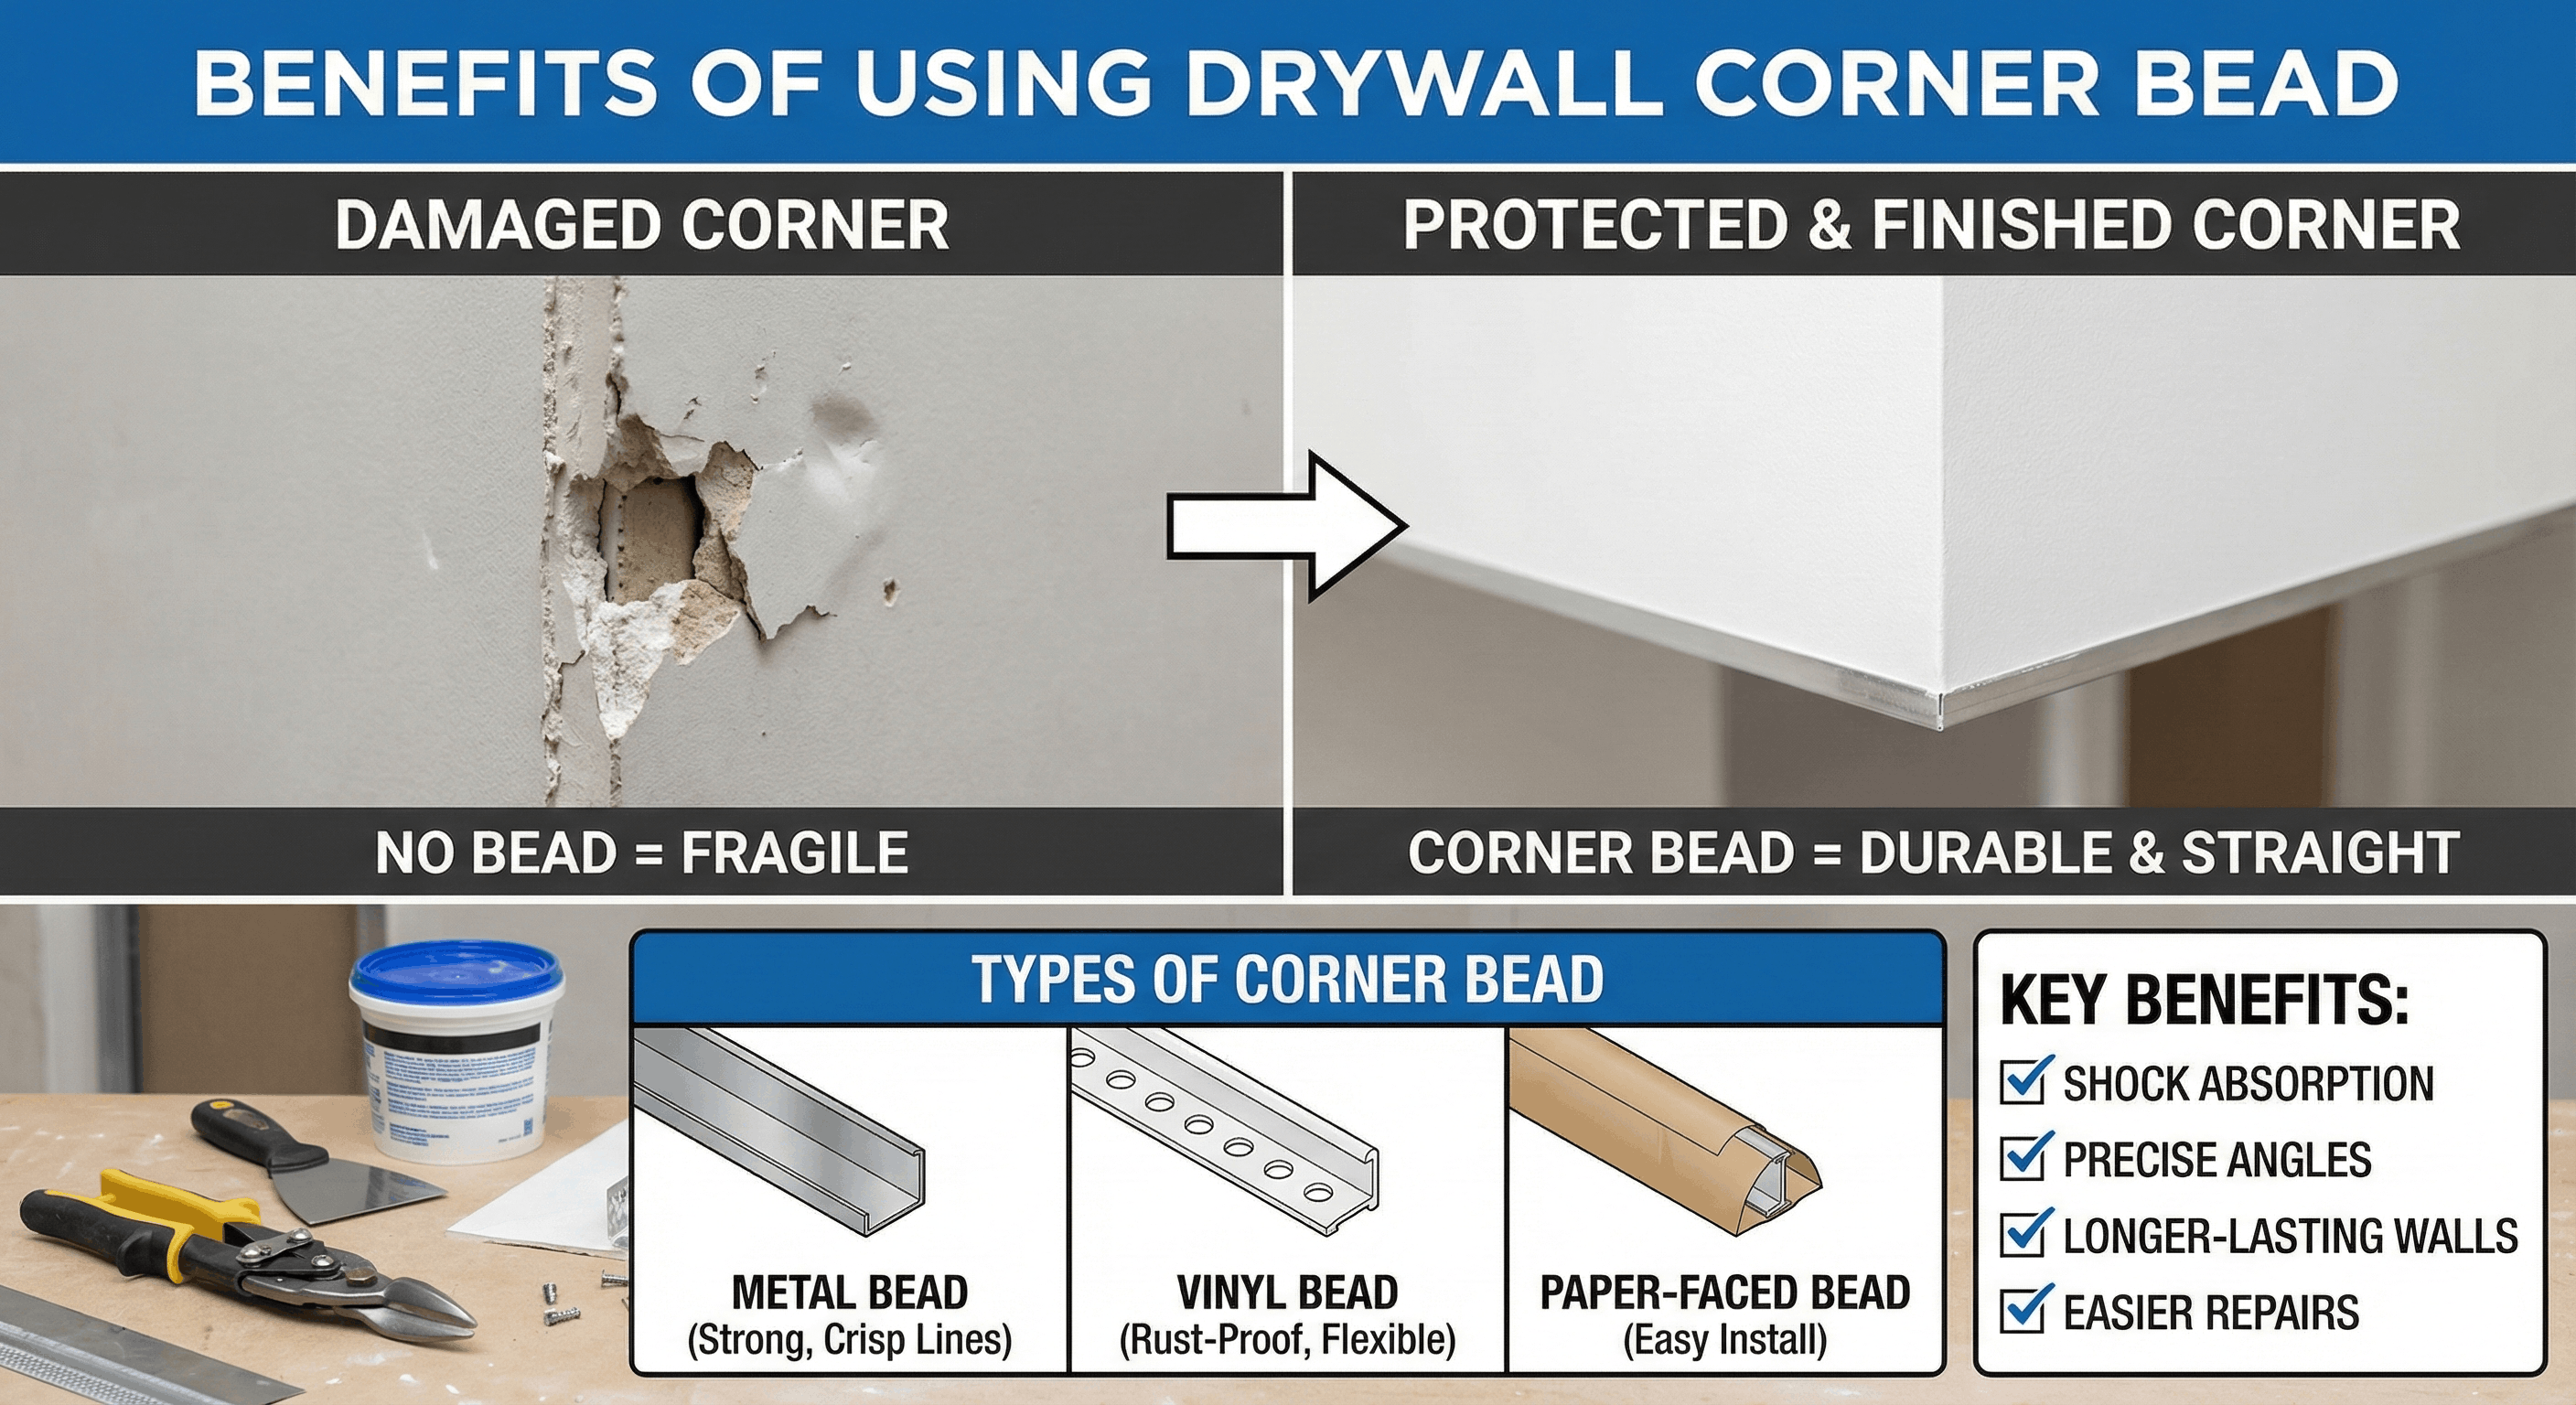
So, what is a corner bead? Think of it as a protective spine for the corner—a rigid strip of metal or vinyl that acts as durable drywall edge trim. While a bead is great for the structural integrity of the wall, many homeowners pair it with Benefits of Using Corner Guard Molding for an added layer of visible, heavy-duty protection in high-traffic zones.
But its job is actually twofold. First, it serves as a tough corner protector for high-traffic areas, absorbing the bumps that would otherwise crumble the wall. More importantly, it provides a perfectly straight guide, allowing a builder or DIYer to create the crisp, professional lines that make a finished room look truly complete.
When you walk down the drywall aisle, you'll see a few different kinds of corner bead. It can be a little confusing, but choosing the right one is simple once you know the key difference between each type. Think of it like picking a tool—you just need the one that fits your specific project.
Your main choice will be between traditional metal and modern vinyl (plastic) beads. Metal is incredibly strong and gives you a perfectly crisp corner, which is why it's a classic choice for high-traffic areas like hallways. Its only downside is the potential for rust if it’s used in a damp area or not fully covered by drywall mud. If you are concerned about moisture or heavy impact, it's worth exploring the Protection That Aluminum Trim Provides , as aluminum offers superior corrosion resistance compared to standard galvanized steel beads.
There's also a third popular option called paper-faced bead. This type has a metal or vinyl core, but it's encased in a paper tape that you embed directly into wet drywall mud. Many DIYers prefer this method because it doesn't require any nails or screws, which can simplify the installation process.
So, which is the best corner protector for your job? Here’s a quick guide:
Metal: Best for sharp corners in high-traffic areas.
Vinyl: Best for damp areas or slightly imperfect walls.
Paper-Faced: Best for an easier, nail-free installation.
Once you’ve picked the right corner bead, the next part—getting it onto the wall and making it look like it was never there—can seem intimidating. The good news is that the process isn't nearly as complicated as it looks. At its core, any corner bead installation, from a small patch to a whole room, boils down to three manageable stages: attach, cover, and smooth.
First, the bead has to be securely attached to the raw drywall corner. Depending on the type you chose, this means either fastening it with a few nails or screws or, for paper-faced bead, pressing it firmly into a thin layer of wet joint compound. Joint compound, often just called "drywall mud," is a paste-like material that acts as both the adhesive and the filler. The goal of this first step is simply to get the bead straight and snug.
Once the bead is fixed in place, you’ll apply your first coat of drywall mud, using a putty knife to cover the bead’s edges and begin blending it into the wall. Don’t worry about making this first pass perfect. The real secret to an invisible repair comes in the final stage: applying one or two more very thin coats after the previous one has dried completely.
With each new coat, you’ll spread the mud a little wider than the last. This simple technique creates a gradual, feathered edge that seamlessly transitions from the raised corner to the flat wall surface. After a light final sanding, the bead completely vanishes, leaving you with a durable, perfectly straight corner that’s ready for paint. This straightforward process of attaching, covering, and smoothing is the key to any professional-looking corner repair.
Understanding the process doesn't mean you need a wall of complicated and expensive equipment. The list of tools for finishing drywall corners is surprisingly short and affordable. You don’t need a professional’s entire kit; a few key items will be more than enough to achieve a fantastic result.
The two tools that will do most of the heavy lifting are probably new to you, but they are simple to use. First, you’ll need tin snips to cut the corner bead to length—think of them as heavy-duty scissors that can cut through thin metal and vinyl with ease. Second, a 6-inch drywall knife is essential. It’s wider than a small putty knife, which allows you to effectively spread the mud and feather the edges for that invisible blend we talked about.
With these items in hand, you just need a few other basics to complete your shopping list. This simple taping guide for outside drywall corners requires only the essentials:
Tin snips
Hammer & nails (or screws/stapler, depending on your bead)
6-inch drywall knife
Joint compound (“drywall mud”)
Sanding sponge
When you first spot a damaged corner, the key is to figure out exactly what you're up against. Is it a simple hairline crack running along the edge, or is the corner itself physically dented inward? Run your fingers over the spot. A crack will feel like a small seam on the surface, but a dent means the hard metal or vinyl bead underneath has been bent out of shape. This quick diagnosis is the most important step in fixing cracked drywall corners correctly.
This distinction matters because you can't simply fill a major dent with drywall mud and expect a good result. Think of the bead as the skeleton of the corner; if the bone is broken, you can't fix it by just adding more skin. Piling compound into a dent on a metal corner creates a weak, thick patch that will likely crack again and will never give you that crisp, professional line. True corner protection comes from a straight, solid bead.
Ultimately, the rule is simple: surface cracks can often be repaired with fresh mud and sanding, but if you have a dented corner, you must cut out the damaged section and replace it. Knowing this difference is what separates a frustrating patch job from a lasting, invisible repair. While this covers the standard 90-degree corners in your home, you might also be wondering about those trickier rounded corners or archways.
Those softer, rounded corners found in many modern homes require a special type of corner protection called a bullnose bead. It’s designed with a built-in curve to match the wall, serving the exact same purpose as a standard bead: it adds strength and gives you a perfectly smooth, consistent radius to finish against. Without it, getting a clean, durable rounded corner would be nearly impossible.
For the elegant curve of an archway or other custom shapes, a different solution is needed. This is where flexible archway corner trim comes in. Usually made of a sturdy vinyl, this bead is designed to bend smoothly, conforming to almost any curve you need to finish. It provides the same essential corner protection for off-angle walls and arches, preventing the dings and chips that would otherwise plague these beautiful features.
Ultimately, the principle remains the same no matter the corner’s shape. Whether your wall forms a sharp 90-degree angle, a soft bullnose curve, or a sweeping arch, there is a specific bead designed to create a strong, professional-looking, and long-lasting edge.
Before you started, that damaged wall corner was a mysterious eyesore. You might have seen a metal strip peeking through and had no idea how to begin a DIY home repair. Now, you can look at that same spot and see the solution: the drywall corner bead. You’re no longer staring at a problem; you’re equipped with the knowledge to fix it right.
Your first step is a simple choice based on location. Is the damaged corner in a high-traffic hallway where it gets bumped often? Choose a sturdy metal bead for maximum strength. Is the repair in a damp basement or bathroom? Go with a rust-proof vinyl bead. This single decision is the most important one you’ll make.
You are now ready to tackle this project. That once-intimidating question of how to fix drywall has a clear answer, and you have it. You've learned the secret to a strong, seamless finish, and the knowledge to achieve a durable repair is now in your hands.
Comments will be approved before showing up.


